Sunday, August 24, 2014

REPAIR: Rear Brake Allen Bolt Failure

I packed up all my camping gear and took off to Shelter Cove last year, going the back way through Petrolia and Ettersburg. It was supposed to be a short 300 mile trip... Buuuuuttttt, the ATK decided to make that not the case.

All packed up in the middle of some Doug Firs that rival some of the bigger Redwoods.

One of the disc bolts decided to back itself out on the road. I heard a slight "tink...tink...tink," and I suspected a rock had worked itself into the disk...

But a sudden jolt stopped the bike in its tracks once it backed out enough to stop itself on the caliper and I got a quick introduction to the gravel.

When I got back to town after limping the last 120 miles trying to avoid using the back brake at all on some steep roads into Shelter Cove I got some replacement bolts. Here is the stripped and bent bolt compared to a new one.

The threads were stripped all to hell as well, So I took the wheel to a local machine shop and rather than re-tapping the threads the guys had the idea to pass a "blank" threaded rod through the aluminum hub that was of equal pitch from the back side where the threads were unaffected.

Passing a "blank"

All four replacement blots back in with a nice fresh application of blue Loctite

Back on the road ready for whatever.
COST:

Labor: Free

Bolts: 3.75

Replacing damaged plastics: Hell no!

MODIFICATIONS: Battery Tender and Shim

So this modification is something that came on my bike, but given the nature of ATK's to eat Batteries it comes in handy. It is an easy plug and play that wires through the existing holes in the battery box on the left hand side of the motorcycle.

Simple hook up to the positive and negative terminals in the battery box. There is a fuse box with a 3 amp purple blade fuse on the positive terminal side that I have had blow a couple of times making me think that the tender itself was toast, but 50 cents later it worked like a champ.

Routed through the left hand side holes behind the frame

And back out beside the motor for easy access

As you might note from the previous pics, the Battery is slightly larger than the battery box. I came up with a simple fix by jamming a cut portion of a ball point pen sleeve that is rubberized and gives enough resistance to keep the battery in place. The zip tie is threaded through the pen so I can retriwve it if it slips down too far in the battery box.

There are also a number of Battery Tender accessories available for the product such as:

USB Charger which would be handy for charging GoPro on the fly, or keeping a GPS charged. For those of us with sheds instead of Garages, an off the grid.

Solar Powered Charger may be worthwhile.

These look like they would be worth checking out.

VIDEOS: Straight Pipe 605

Never going to do it on my bike, but now I know. Shooting flames! Thanks Youtube.

BIKES: Craigslist Customs

When I run across interesting bikes on Craigslist I try to make a point of saving the pics, which I will publish here with absolutely no permission whatsoever, except that the original owners put them out on the interwebz, and I say that is open season. Also, by "interesting" I may mean kick ass, or not so-much-so.

Carbon Fiber may look cool on some bikes

this is not one of those bikes

Gotta love the black and blue no logo style.

Note the custom black rims too

This bike is super clean, and takes advantage of the weight savings by ditching the plastics and bash plate.

I'm pretty sure you could save that much weight by taking a poop before riding. He also has incorporated the oft needed after market kick stand.

This owner tried to make his bike look super pimp with some color variation, but inadvertently provided us with a nice photoshop template to try out new colors on our bikes!

This shot looks a little more honest

This is the only appropriate color scheme for a red frame. Don't know why we don't see more of these floating around. Super beast mode! Also that sprocket doesn't exactly look like a Talon made situation... hmmmmmmm

Mardi Gras themed ATK. Would you like to earn some beads?

Super clean street tracker.

Looks like the owner plopped an 18 on front and done. Digging that custom seat, looks plush.

Flat track style: check - low mounted Supertrapp, custom tank topper to match the seat, all he needs is the last bikes wheel set and he should be golden.

MURDERED OUT! This guy's ad said that he had just murdered the whole bike out using Plastidip... I'm willing to bet that has not stayed on the Rotax. Just be glad he left the discs alone.

Red, White, and Blue

Yet still looks a tad alien, no?

Like a girl with some overenthusiastic rhinoplasty.

BLOG: Back in the Saddle

Alright, it has been over a year since I last posted, then again, I think that is because I have been doing so much riding.

I got days and days of loops.

Enjoying the view

But with roads like these...

Who can blame me?
COST: $Nothin'

Sunday, May 19, 2013

MODIFICATION: FORK SWAP STEP 7: GAUGES

The old ATK speedo / odo / tripo is not compatible with the CRF front end. In looking at internet research about replacements for the stock gauges, I went with the very prevalent and affordable Trail Tech Vapor. Trail tech has great support, and answered all my questions regarding compatibility within 24 hours. Given their advice since I had a frankenstein combo of an ATK and CRF 250, I went with the 752-402 which is specific for the Honda XR series, but has cross compatibility with the CRF wheel speedo sensor, but has a simple copper ring for block temperature since I do not have a radiator line to tap into like the CRF specific kit would have included.

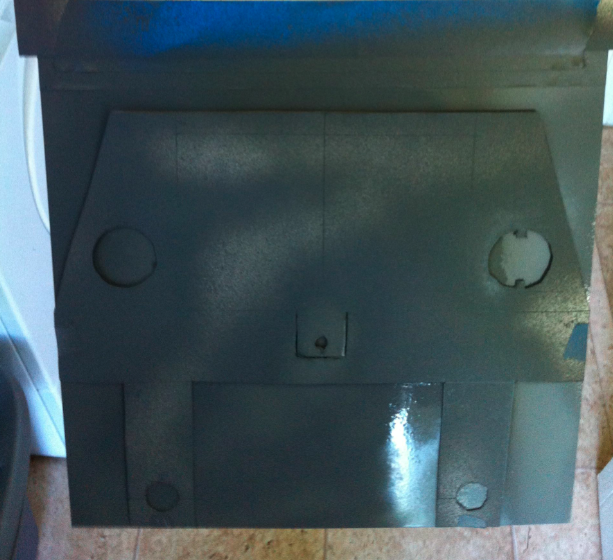
After getting the general placement worked out on the new dashboard, I marked the aluminum, then drilled and dremeled holes for the mounting allens and a hole for the various wire connections to pass through.

Allens tightened and wires passed.

Uh oh, looks like the brake line routing might be a problem, but tried not to stress it and continued with the install

Had to remove the Nissin caliper and drill a 1/8" hole to mount the speedo sensor. The magnetic bolt switched out easily with the stock CRF disc brake bolt.

Trying to get the unit powered by the 12V ATK system proved to be somewhat vexing. The stock connector to the ATK speedo light had 2 positive and 2 negative wires, which I assumed might be related to the key positions.

The system requires an inline 1/2 amp fuse. I opted for an inline connector from ACE and a 1/2 amp tube fuse from Radioshack.

I ended up soldering the two red wires to the inline fuse connector then to the smaller diameter red wire into the unit. The black wire i soldered to bothe black stock ATK wires as well.

Success! Power worked great, and the unit lit up bright blue when the key was turned to the full "on" position" and stayed off when only half turned. The brake line and speedo sender cable that was routed in-tandem were not an issue with screen visibility once seated on the bike.

I had a slight issue with the tachometer wire when routed alongside all of the other wires through the gap between the frame and the gas tank. There was a lot of electrical interference which caused the tach reading and speed to jump all over the place. Rerouting the wire away from all of the other electrics solved that problem and the unit has been functioning perfectly with heat warning lights and shifting signals (albeit the brake line does somewhat interfere with the visualization of these on the unit).
Part #s:

752-402 Trail Tech Vapor Stealth for XR Series

FH30B Inline Fuse Connector:

270-1018 1/2 amp Fuse:
COSTS:

Trail Tech Vapor Stealth 752-402: $93.17 from Amazon

Inline Fuse Connector: $3.84 from ACE

1/2 amp Fuse: $3.19 for 4 pack from Radioshack

MODIFICATION: FORK SWAP STEP 6: CUSTOM DASHBOARD

Using the stock ATK dashboard with the the forks was a definite no-go, so I set out to measure, design, and mock up something that would fit want I needed (Ignition Mount, Trail Tech Vapor, and Front Brake Guide Ring).

A quick paper mock up revealed not enough rise from the lower mounts to the upper mount to span the height of the upper triple, so I had to extend it slightly.

That's better, now for trans-positioning the correct measurements to a sheet of aluminum:


Tin snips made what I thought was going to be a long and arduous wrestling match with a DREMEL very easy

The Dremel lucha libre ensued to cut out the ignition mount (notice the small square tabs for the switch to lock in when threading it in. Fortunately the areas where the Dremel ran away from me were on the underside of the dashboard (Always grind upside down when doing something you have to look at and possibly regret your unsteady hand)

I drilled some small trim holes, then wrapped and zip tied some split garden drip line to clean up the edges.

A small plastic trim ring from ACE helped clean up the brake line routing. You will need a small cut through the aluminum and trim ring to the outside edge in order to pass the brake line through, unless you plan on disassembling your brakes and re-bleeding them afterwards. I opted for the easy route!

I am really pleased with the outcome, however when riding the shiny aluminum reflects at the perfect angle to hit my eyes. Hopefully the Trail Tech will help reduce the glare.

Part #s:

5157615 8x18" Aluminum Sheet

Unknown: 1" Plastic Grommet

717089 1/4 x 50 Feeder Tubing
COSTS:

8x18" Aluminum Sheet: $8.59 at ACE

1" Plastic Grommet: $0.89 at ACE

1/4 x 50 Feeder Tubing $5.19 at Local Garden Supply Store